The WTF MOD - OIL CATCH TANK for LESS THAN A FIVER!
The Gas-Tronomic Garage - The WTF MOD :: ENGLISH :: Automotive / Eco Modding :: General Mods / Dollar Store Mods :: Oil Catch Tank / Water Bubbler / Fuel Vaporizer
Page 1 of 1
 The WTF MOD - OIL CATCH TANK for LESS THAN A FIVER!
So. What is an oil catch tank?
It is a device that is usually fitted between your crank case / rocker cover breather hose and your air inlet pipe.
Use it to clean up your emissions, stop crud from causing engine wear, oil fouling, and also as a tool to find out if your turbo is leaking oil or not.
Here is what I used but the actual tank can be made from a variety of other things:

I have a glass coffee jar with a metal body and lid with a level hole. Ideal for being able to see when it needs emptying.
2x 19mm brass fittings. I chose different size ID, so that I have a smaller outlet so as to create a reduction zone that will encourage more oil drop out from the vapour.
I am being critical here - you can use the same size fittings if you wish, but you will get better results with a reduction on the outlet.
2x O-Rings to seal the brass fittings once threaded into the jar lid - Silicone sealer will also do the job.
1 rubber hose or tube of some kind to fit down to the bottom of the container
NEXT:
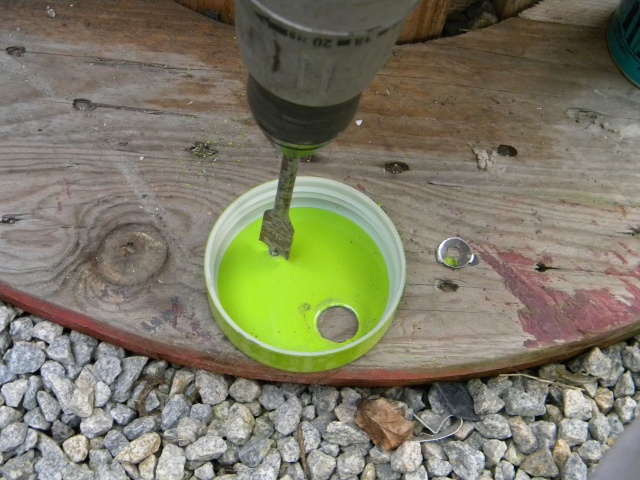
Drill out the holes for the fittings. I am using a 19mm flat bit wood hole cutter. This will not be a very useful tool if you choose a stainless steel container instead of aluminium or steel.
Once the holes are cut - you can then thread in the fittings - BUT - make sure there will be clearance on the inside of the container for the fitting position - BEFORE DRILLING
NEXT:
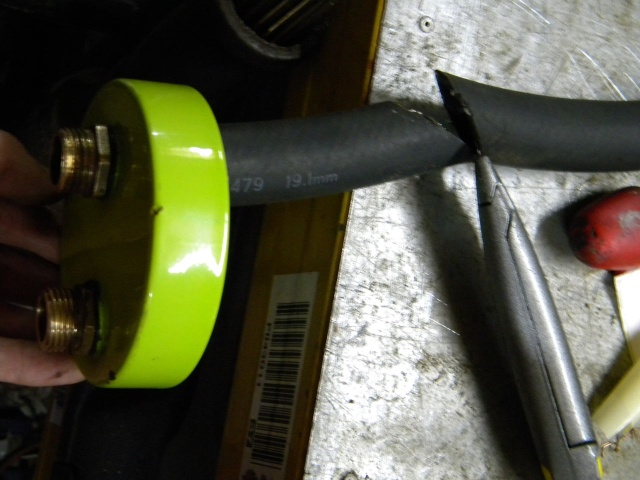
Thread the fittings and the hose. I am cutting the hose at an angle to face the side of the jar to encourage drop out through condensing. It may of may not need securing with a jubilee clip. Mine is a good fit and does not require one.
NEXT:
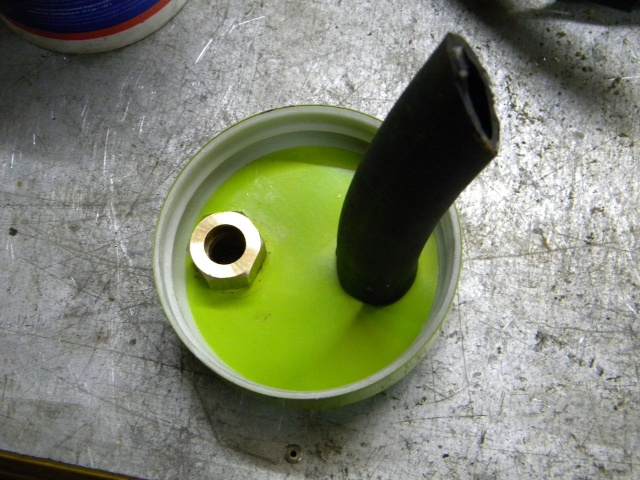
I have threaded a nut to secure against loose fitments without the need of glue or silicone.
NEXT:
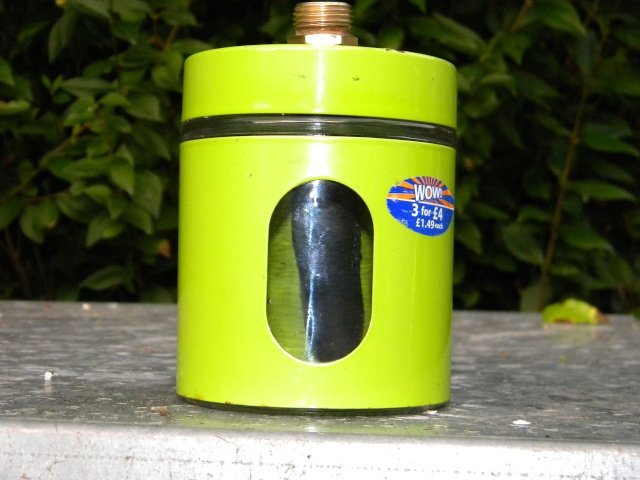
Put the lid on AND YOU ARE DONE
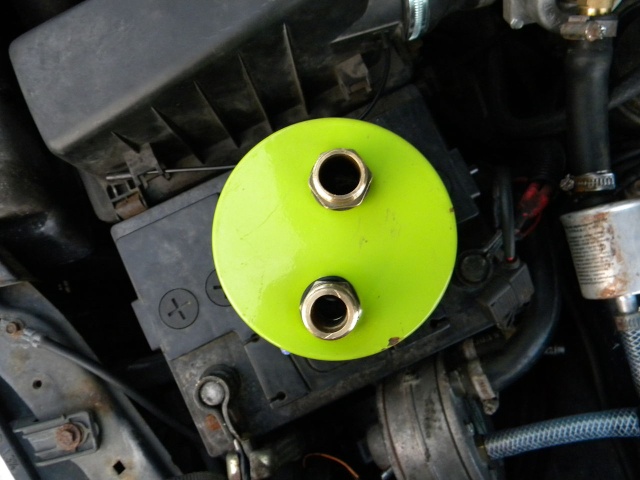
Now I will show you how to make a mounting bracket and fit it to the engine hoses.
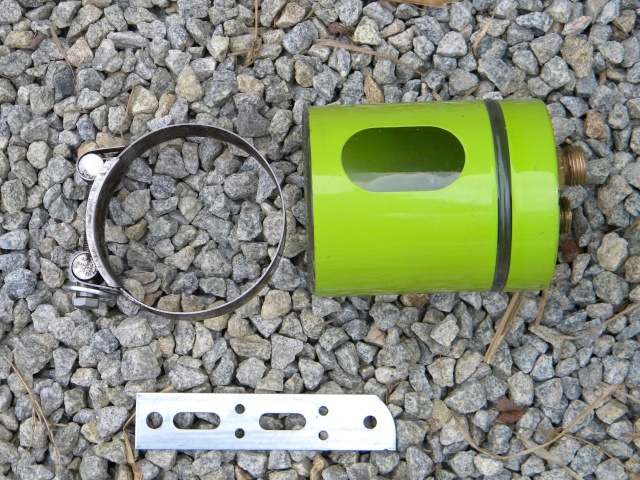
To keep it simple - We have a flat re-drilled piece of metal - You can drill your own if you like.
Mine however allows for further adjustment through the longer holes should I need it.
Also an exhaust or pipe clamp with a bolt attached to it.
NEXT:

Find a suitable spot to mount the bracket - not too far from the breather pipes.
I chose the solid mount for the intercooler pipe.
NEXT :
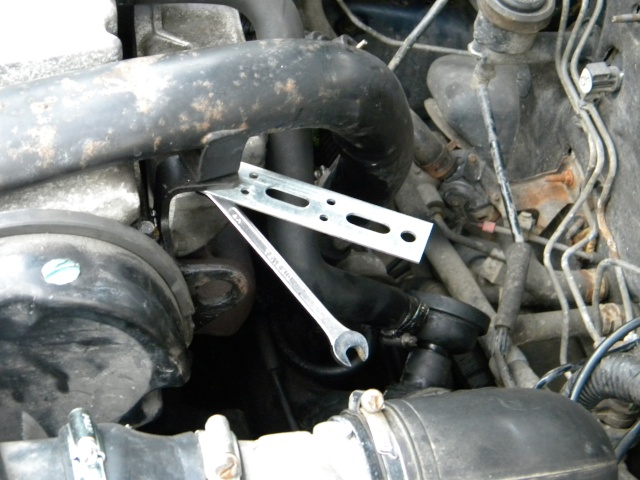
You may wish to bend this off the car. I am fitting it before finding my preferred position.
NEXT:

Bracket now bent into position.
NEXT:
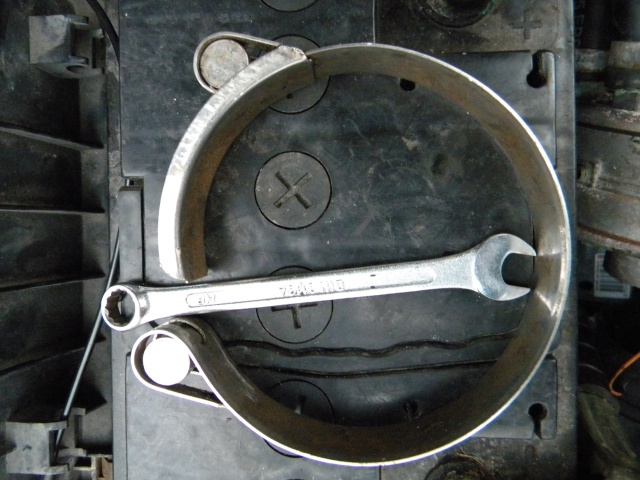
Open the clamp by removing the bolt. This is to be attached to the bracket.....
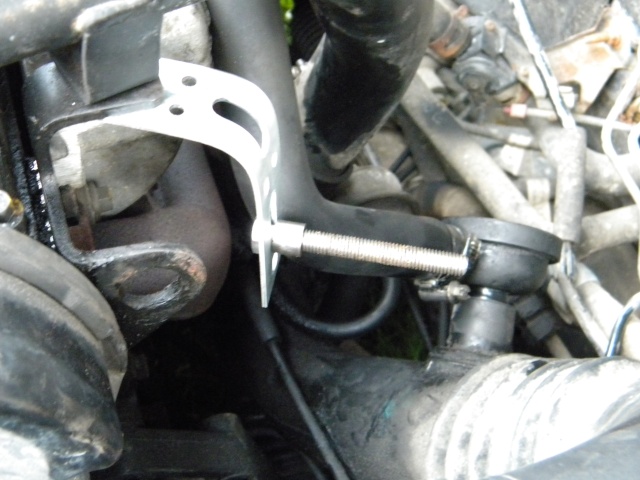
Like this.... Feel free to add washers as required. Now you re-attach the clamp to its bolt - and size up your can..
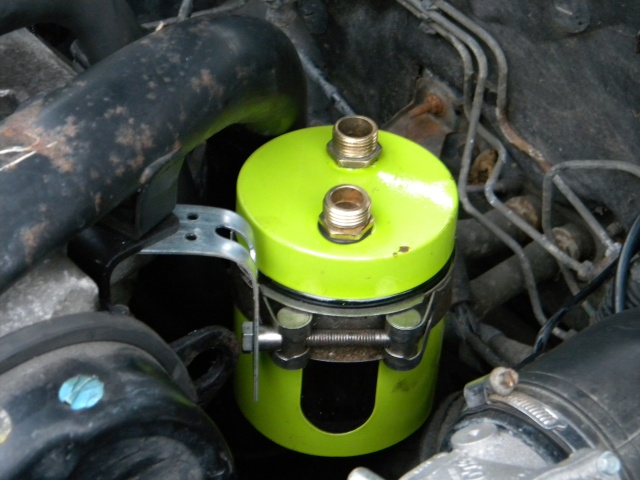
Also required maybe some rubber to fit around the can to give it a comfort fit in the bracket. Mine is snug as a bug... so no need.
NEXT:
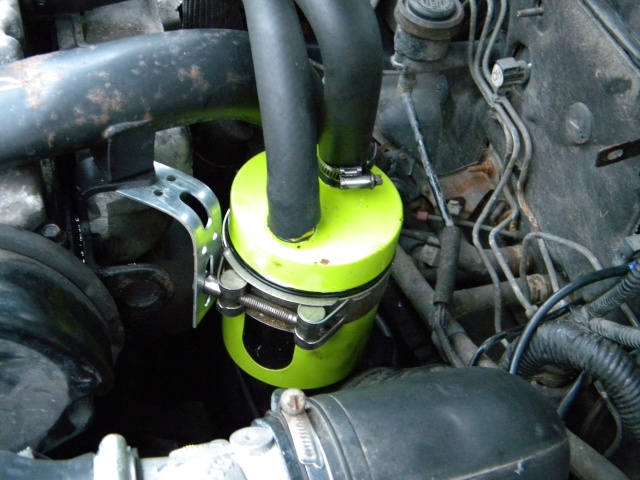
Time to thread on the pipes. Do not cut the pipes until you are happy you can get from the breather outlet - to the breather inlet - without putting kinks in the pipe. If you are lucky you can do it with the original pipe I have an extra piece of oil rated pipe.
You will also need 2 more hose clips if your original pipe already had 2.
If you can't do it without kinking the pipe, I suggest the use of copper plumbing elbows, which would allow you to change the angle or the pipe.
Silicone pipe also would be much better, but more expensive. However if you play your cards right - you get the silicone hose, a tidy clamp and can, and some scraped knuckles for less than the cost of a new catch-tank ALONE.
So far - this cost less than a tenner for the lot to you - But I did have all these parts lying around, so almost free!!

It is a device that is usually fitted between your crank case / rocker cover breather hose and your air inlet pipe.
Use it to clean up your emissions, stop crud from causing engine wear, oil fouling, and also as a tool to find out if your turbo is leaking oil or not.
Here is what I used but the actual tank can be made from a variety of other things:

I have a glass coffee jar with a metal body and lid with a level hole. Ideal for being able to see when it needs emptying.
2x 19mm brass fittings. I chose different size ID, so that I have a smaller outlet so as to create a reduction zone that will encourage more oil drop out from the vapour.
I am being critical here - you can use the same size fittings if you wish, but you will get better results with a reduction on the outlet.
2x O-Rings to seal the brass fittings once threaded into the jar lid - Silicone sealer will also do the job.
1 rubber hose or tube of some kind to fit down to the bottom of the container
NEXT:

Drill out the holes for the fittings. I am using a 19mm flat bit wood hole cutter. This will not be a very useful tool if you choose a stainless steel container instead of aluminium or steel.
Once the holes are cut - you can then thread in the fittings - BUT - make sure there will be clearance on the inside of the container for the fitting position - BEFORE DRILLING
NEXT:

Thread the fittings and the hose. I am cutting the hose at an angle to face the side of the jar to encourage drop out through condensing. It may of may not need securing with a jubilee clip. Mine is a good fit and does not require one.
NEXT:

I have threaded a nut to secure against loose fitments without the need of glue or silicone.
NEXT:

Put the lid on AND YOU ARE DONE

Now I will show you how to make a mounting bracket and fit it to the engine hoses.

To keep it simple - We have a flat re-drilled piece of metal - You can drill your own if you like.
Mine however allows for further adjustment through the longer holes should I need it.
Also an exhaust or pipe clamp with a bolt attached to it.
NEXT:

Find a suitable spot to mount the bracket - not too far from the breather pipes.
I chose the solid mount for the intercooler pipe.
NEXT :

You may wish to bend this off the car. I am fitting it before finding my preferred position.
NEXT:

Bracket now bent into position.
NEXT:

Open the clamp by removing the bolt. This is to be attached to the bracket.....

Like this.... Feel free to add washers as required. Now you re-attach the clamp to its bolt - and size up your can..

Also required maybe some rubber to fit around the can to give it a comfort fit in the bracket. Mine is snug as a bug... so no need.
NEXT:

Time to thread on the pipes. Do not cut the pipes until you are happy you can get from the breather outlet - to the breather inlet - without putting kinks in the pipe. If you are lucky you can do it with the original pipe I have an extra piece of oil rated pipe.
You will also need 2 more hose clips if your original pipe already had 2.
If you can't do it without kinking the pipe, I suggest the use of copper plumbing elbows, which would allow you to change the angle or the pipe.
Silicone pipe also would be much better, but more expensive. However if you play your cards right - you get the silicone hose, a tidy clamp and can, and some scraped knuckles for less than the cost of a new catch-tank ALONE.
So far - this cost less than a tenner for the lot to you - But I did have all these parts lying around, so almost free!!

The Gas-Tronomic Garage - The WTF MOD :: ENGLISH :: Automotive / Eco Modding :: General Mods / Dollar Store Mods :: Oil Catch Tank / Water Bubbler / Fuel Vaporizer
Page 1 of 1
Permissions in this forum:
You cannot reply to topics in this forum Home
Home